Azure Data Factory Part 3 U-SQL and JSON
This is part 3 (of 3) of my blog series on the Azure Data Factory. You can find the other two parts here:
Transformation Activity
In this blog post, we’ll look at how you can use U-SQL to transform JSON data.
We’ll be doing the following
- Create linked Service for the Azure Data Lake Analytics account
- Create Extractor, Outputter and functions for working with json data. We’ll use Microsoft.Analytics.Samples.Formats
- Create an U-SQL script for aggregating values in a json file (locally, using Visual Studio)
- Upload necessary files to Azure
- Create DataSets for the U-SQL pipeline
- Create a pipeline that uses the U-SQL script (create a transformation activity)
To learn more about U-SQL, go here.
Prerequisites
If you haven’t done Part 1, you should do that first. You will need the Data Lake Analytics account we created with the associated Azure Data Lake Store (ADLS), and also the Azure Data Factory.
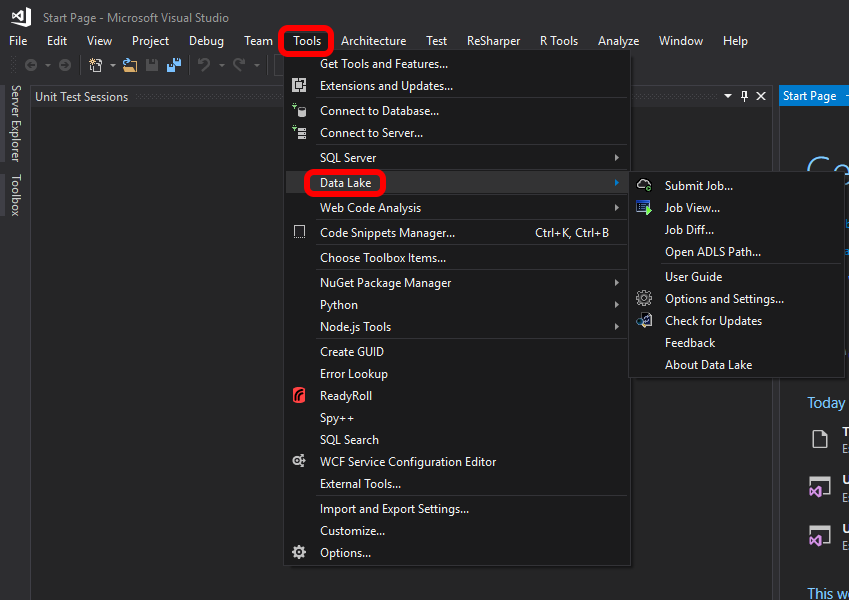
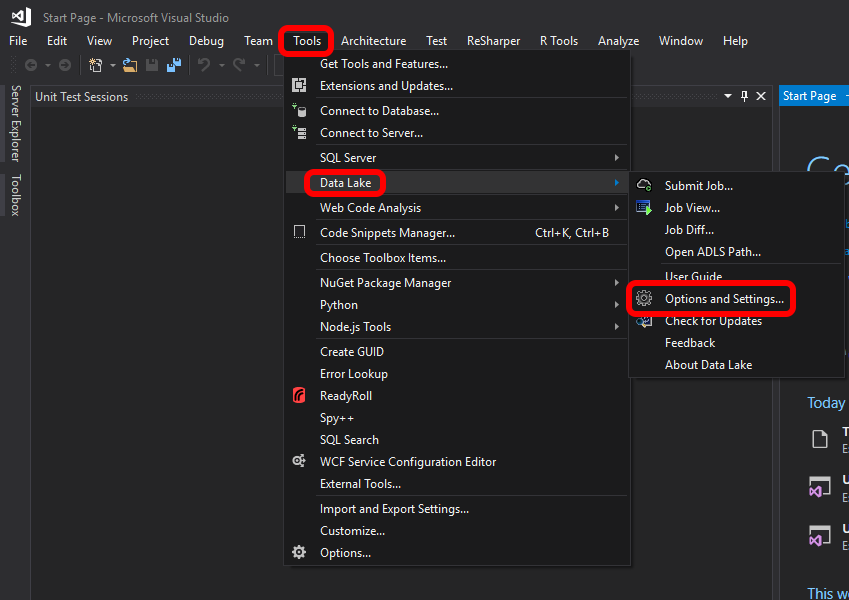
Make sure you have Data Lake Tools for Visual Studio installed. To verify that you do, check that you have this Menu item in Visual Studio 2017:
Limitations
As of August 2017, you can’t use service principal authentication for a Data Lake Analytics linked service. But I assume it’s coming, since they say that it’s the preferred method for authentication in the documentation (https://docs.microsoft.com/en-us/azure/data-factory/data-factory-usql-activity) 🙂
1. Create Linked Service
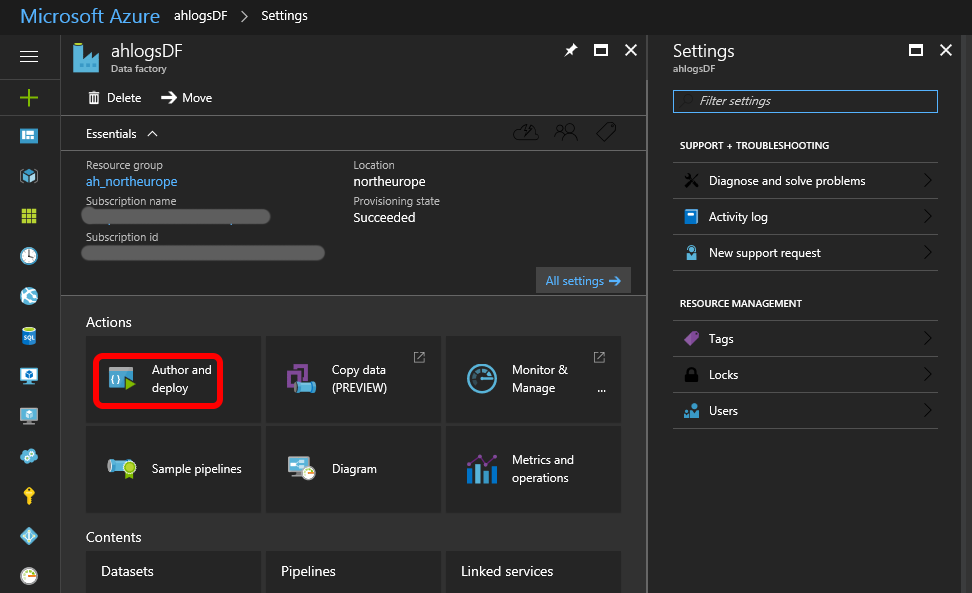
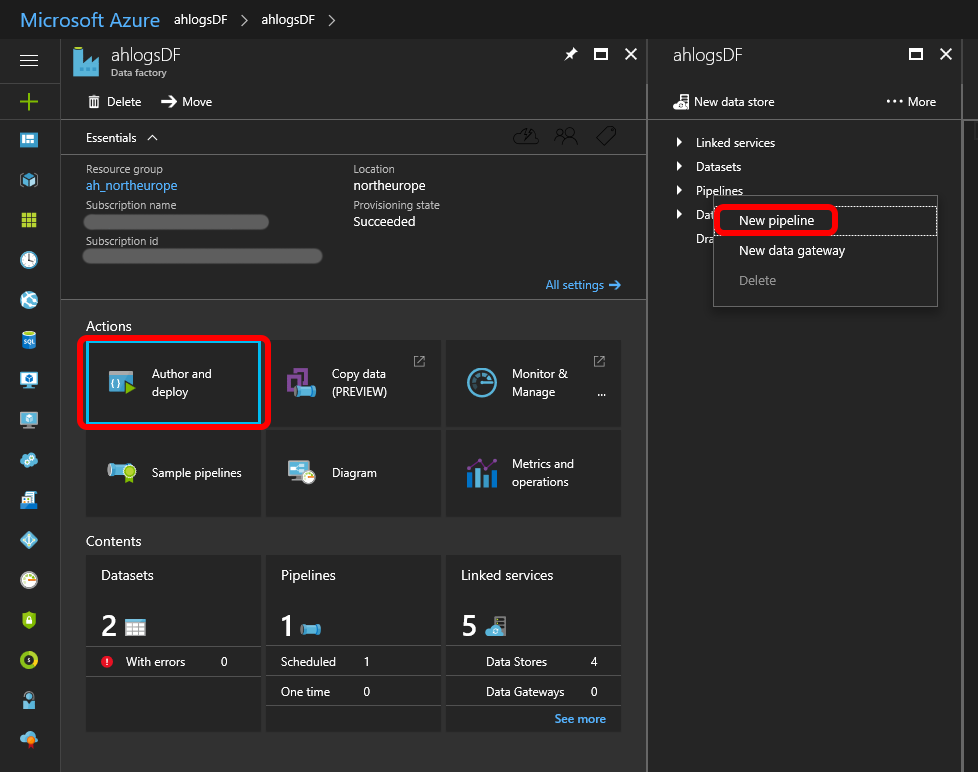
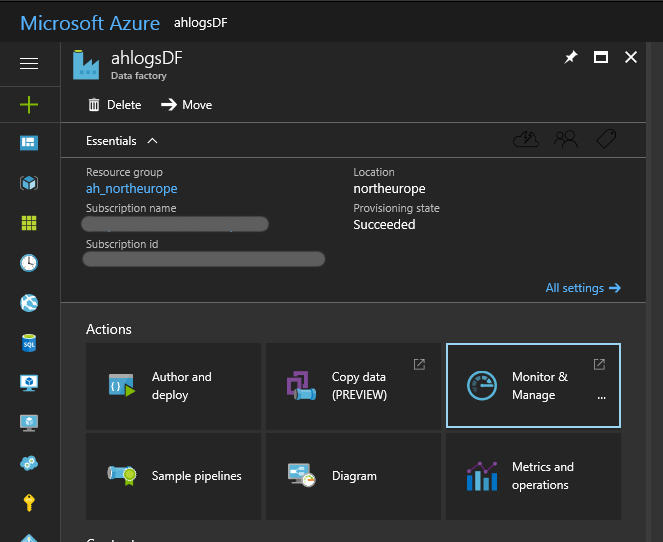
Open the Azure Data Factory you created in Part 1 and click Author and Deploy:
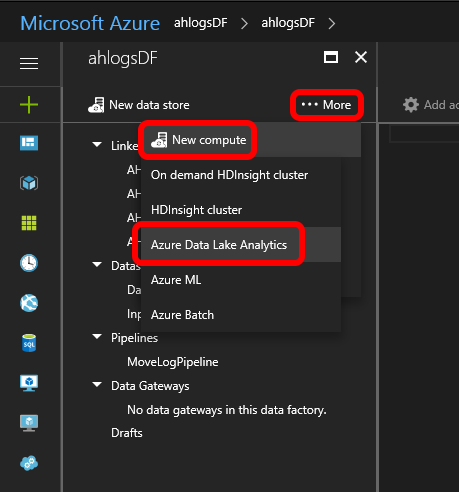
The click …More -> New compute -> Azure Data Lake Analytics:
Fill in your values, and click Authorize.
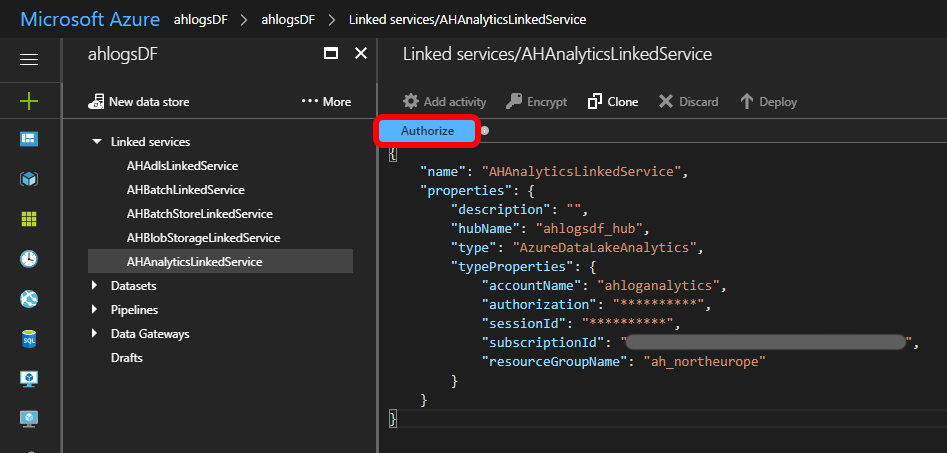
OBS: As of August 2017, you can’t use service principal authentication as recommended here: https://docs.microsoft.com/en-us/azure/data-factory/data-factory-usql-activity#azure-data-lake-analytics-linked-service. It’s not implemented yet. That is way you get squigglies if you use servicePrincipalId etc, instead of accountName and sessionId.
2. JSON Extractor, Outputter and functions
U-SQL doesn’t have a built in extractor for JSON, and it doesn’t have an Outputter or functions for working with JSON either. So you have to create your own, or you can use what you find on the interweb. We’ll be using the following Repo: https://github.com/Azure/usql.
Clone the repo, and build the solution you find under Examples -> DataFormats (Microsoft.Analytics.Samples.sln). Alternatively, you can download the one I compiled 22 Aug. 2017:
- Assemblies (zip also contains Newtonsoft.Json.dll, that we’ll be needing)
We’re using the 8.0.3 version of Newtonsoft.Json.dll.
3. Create a U-SQL script for working with json
When I first create a U-SQL script, I run everything locally.
Open Visual Studio 2017 -> New Project.
Under the Installed project templates, you should find Azure Data Lake -> U-SQL:

Leave the default names, and click OK. You should now have a U-SQL project with a single (empty) script file called Script.usql.
Under Tools, goto DataLake -> Options and Settings…:
Notice the DataRoot value:

Copy the path for this directory, and open it in File Explorer.
Create two new folders:
- adfpart3
- assemblies
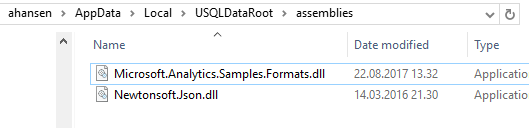
Copy the following dll’s to the assemblies folder (see step 2 on how to get the dll’s):
In the adfpart3 folder, create a file called citydata.json with the following content:
{
    "cityData":
        [
            { "city": "Oslo", "count": 3 },
            { "city": "London", "count": 6 },
            { "city": "Bergen", "count": 1 },
            { "city": "Oslo", "count": 2 },
            { "city": "Oslo", "count": 8 },
            { "city": "London", "count": 3 }
        ]
}
This will be the input for our transformation activity.
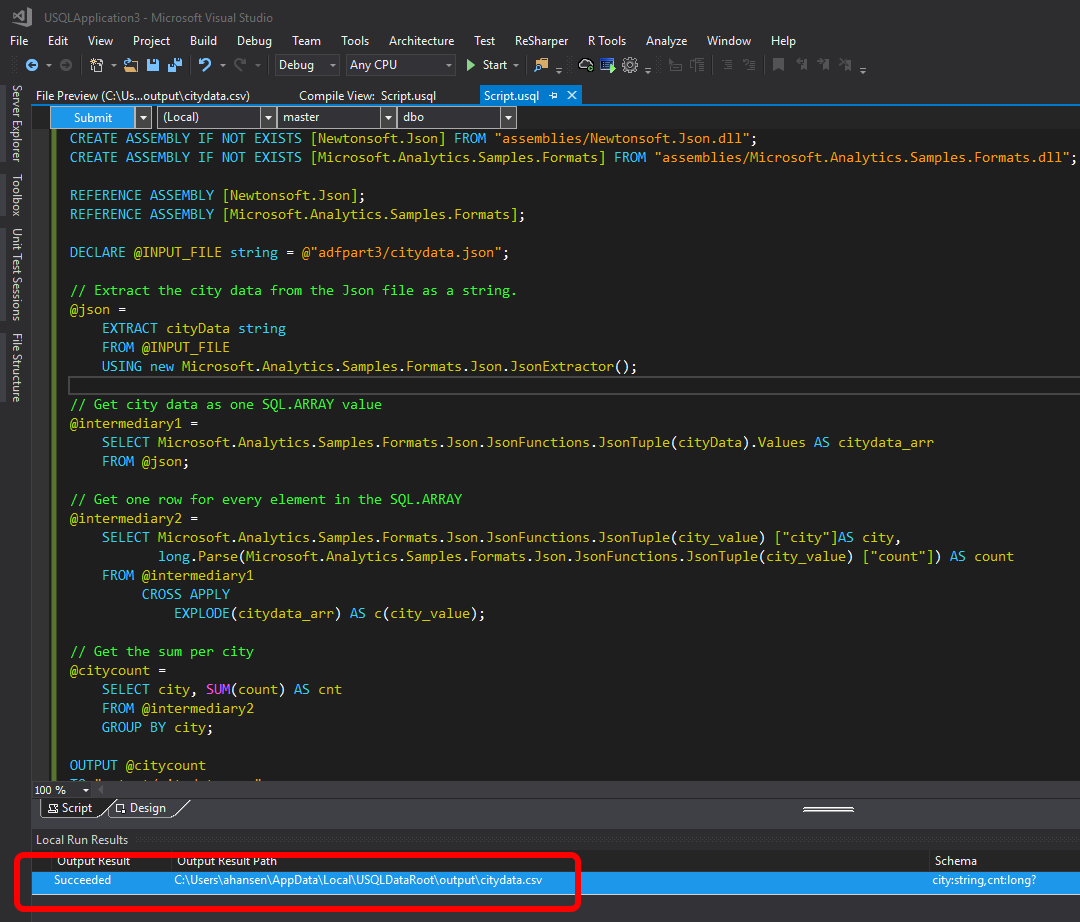
When you created your U-SQL project, you got an empty Script.usql file. Add the following content to that file:
CREATE ASSEMBLY IF NOT EXISTS [Newtonsoft.Json] FROM "assemblies/Newtonsoft.Json.dll";
CREATE ASSEMBLY IF NOT EXISTS [Microsoft.Analytics.Samples.Formats] FROM "assemblies/Microsoft.Analytics.Samples.Formats.dll";

REFERENCE ASSEMBLY [Newtonsoft.Json];
REFERENCE ASSEMBLY [Microsoft.Analytics.Samples.Formats];

DECLARE @INPUT_FILE string = @"adfpart3/citydata.json";

// Extract the city data from the Json file as a string.
@json =
    EXTRACT cityData string
    FROM @INPUT_FILE
    USING new Microsoft.Analytics.Samples.Formats.Json.JsonExtractor();

// Get city data as one SQL.ARRAY value
@intermediary1 =
    SELECT Microsoft.Analytics.Samples.Formats.Json.JsonFunctions.JsonTuple(cityData).Values AS citydata_arr
    FROM @json;

// Get one row for every element in the SQL.ARRAY
@intermediary2 =
    SELECT Microsoft.Analytics.Samples.Formats.Json.JsonFunctions.JsonTuple(city_value) ["city"]AS city,
           long.Parse(Microsoft.Analytics.Samples.Formats.Json.JsonFunctions.JsonTuple(city_value) ["count"]) AS count
    FROM @intermediary1
         CROSS APPLY
             EXPLODE(citydata_arr) AS c(city_value);

// Get the sum per city
@citycount =
    SELECT city, SUM(count) AS cnt
    FROM @intermediary2
    GROUP BY city;

OUTPUT @citycount
TO "output/citydata.csv"
USING Outputters.Csv(quoting : false);
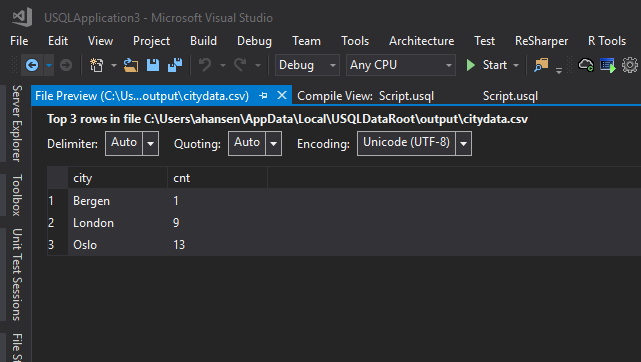
All we are doing with this script, is aggregating the count for the cities. With our input, the expected output is:
- Bergen, 1
- London, 9
- Oslo, 13
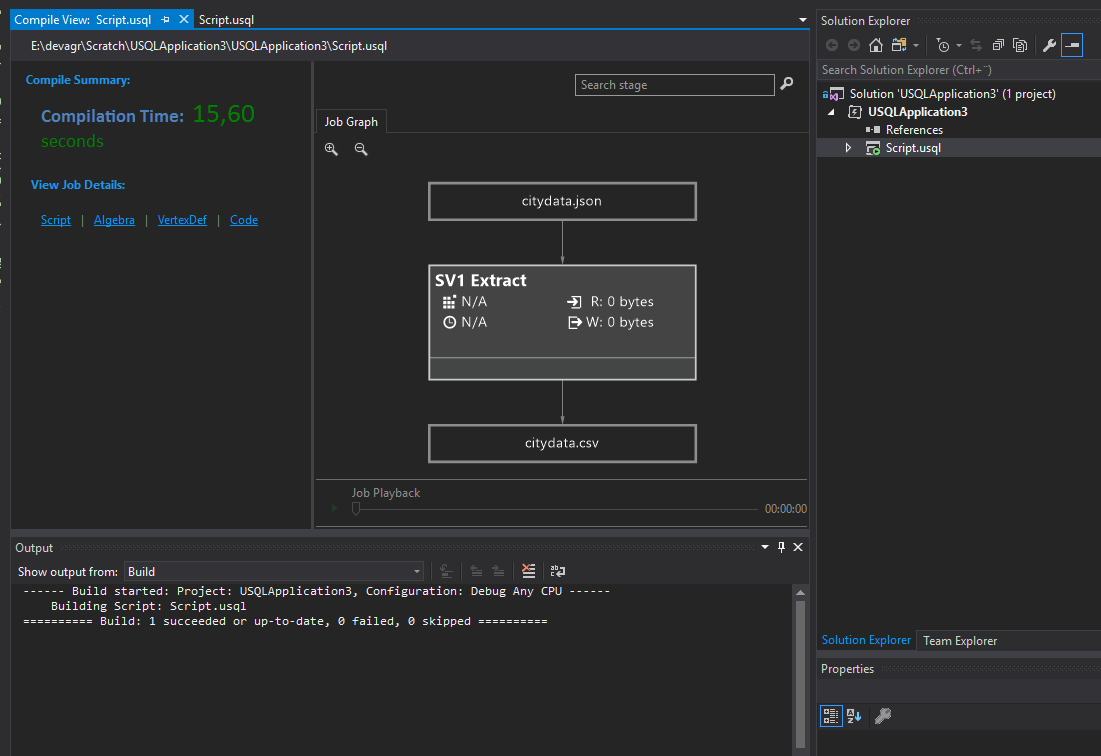
PS: If you compile the project now, you get a result like below, but the script has not executed yet.
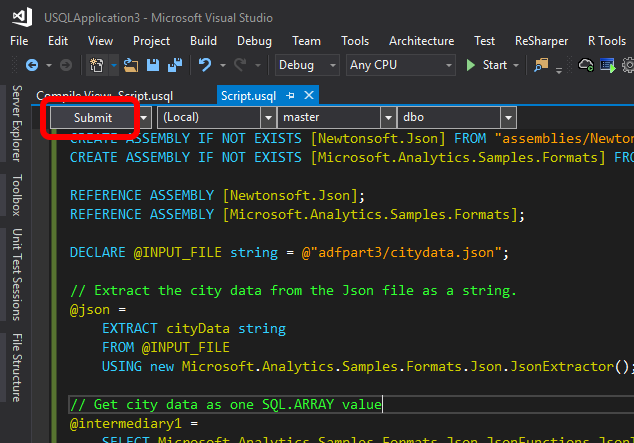
Now, click Submit:
And after a few seconds, you should get a command window that looks something like this:
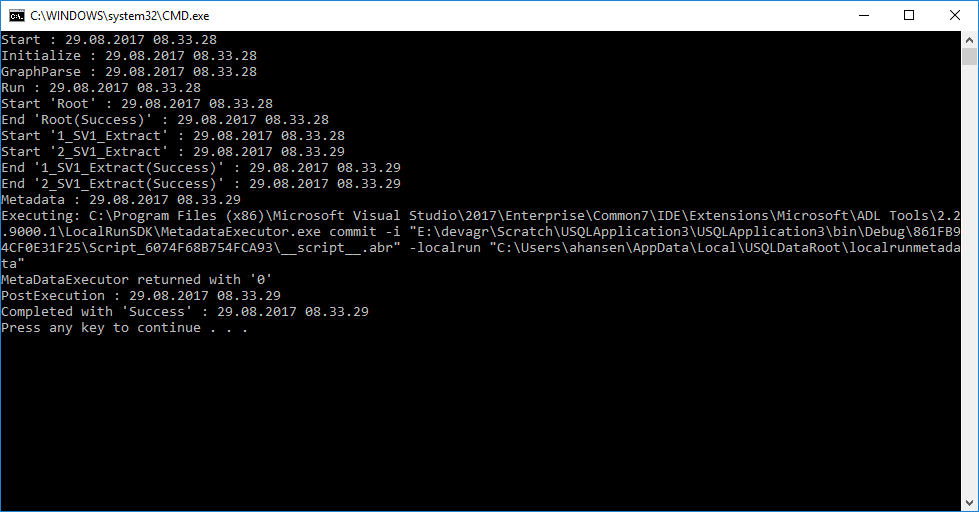
Press any key to close the cmd windows. You now have the result as a text file with comma separated values (.csv file). You will find the file in a folder called output under the U-SQL DataRoot directory (see above), but the easiest way to view the file, is to double-click the line in the Script tab in Visual Studio:
And, as you can see, we got the expected result:
Copy the Script.usql file to the desktop and rename it to part3.usql.
4. Upload necessary files to Azure
4.1 Upload script and dll’s to Azure Storage
In part 1, we created a Linked Service to an Azure Storage called ahnortheuropestorage. We’ll use this, but you can use any azure storage you want, as long as you have a linked service to it.
OBS: Currently (as of Aug. 2017), you can’t store your script in an Azure Data Lake Store
Using the Microsoft Azure Storage Explorer do this:
- Create a new container called adfpart3
- Upload the part3.usql file to the root of this container
- Create a folder in this container called assemblies
- Upload the following files into the assemblies folder (see step 2 on how to get the dll’s):
- Microsoft.Analytics.Samples.Formats.dll
- Newtonsoft.Json.dll
4.2 Create test input in Azure Data Lake Store
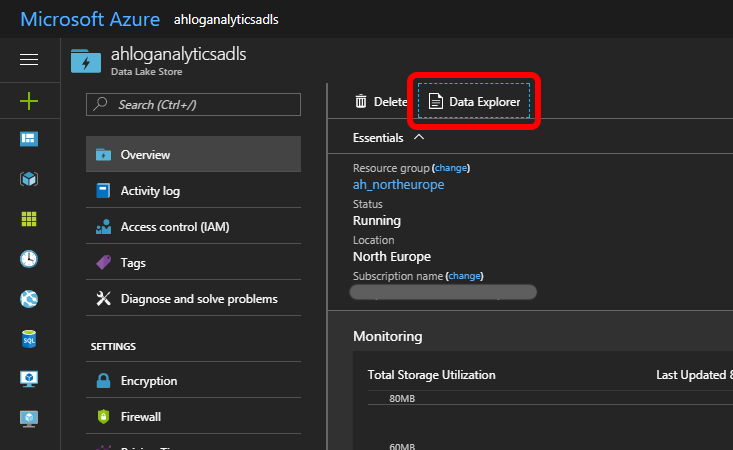
In part 1, we created a new Azure Data Lake Store (ADLS) when we created the Data Lake Analytics account. This will be the source for our input data for the U-SQL script.
Go to this ADLS, open the Data Explorer:
Create a new folder called adfpart3:

When we tested the U-SQL script locally, we created a test file called citydata.json. Upload this file into the adfpart3 folder in ADLS.
We are now ready to setup the dataset’s and pipeline.
5. Setup the datasets
We are going to create two datasets. One for the input (Json files), and we’ll create one for outputting the result as a text file with comma separated values.
5.1 Dataset for input
In the Azure Data Factory, click Author and Deploy:
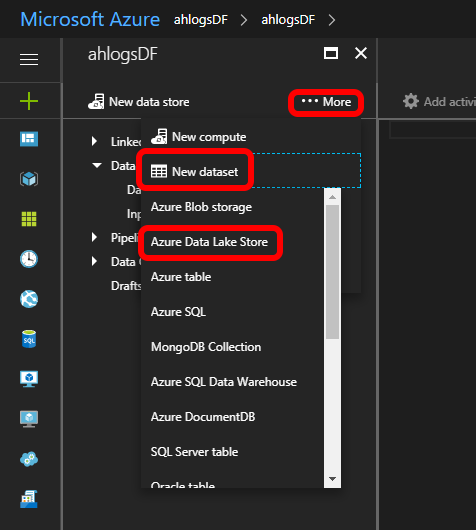
Click … More -> New dataset -> Azure Data Lake Store:
Change the json, so it looks like this:
{
    "name": "InputForAdfPart3",
    "properties": {
        "published": false,
        "type": "AzureDataLakeStore",
        "linkedServiceName": "AHAdlsLinkedService",
        "typeProperties": {
            "folderPath": "adfpart3/input",
            "format": {
                "type": "JsonFormat"
            }
        },
        "availability": {
            "frequency": "Minute",
            "interval": 15
        },
        "external": true,
        "policy": {}
    }
}
Click Deploy.
5.2 Dataset for output
Same as for the input, create a new Data Lake Store dataset.
Click … More -> New dataset -> Azure Data Lake Store:
Change the json, so it looks like this:
{
    "name": "OutputForAdfPart3",
    "properties": {
        "structure": [
            {
                "name": "city",
                "type": "String"
            },
            {
                "name": "count",
                "type": "Int32"
            }
        ],
        "published": false,
        "type": "AzureDataLakeStore",
        "linkedServiceName": "AHAdlsLinkedService",
        "typeProperties": {
            "fileName": "citydata.csv",
            "folderPath": "adfpart3/output",
            "format": {
                "type": "TextFormat",
                "rowDelimiter": "\n",
                "columnDelimiter": ","
            }
        },
        "availability": {
            "frequency": "Minute",
            "interval": 15
        }
    }
}
Click Deploy.
6. Create the pipeline
With a linked service to the Data Lake Analytics account, and the input and output datasets done, we are now ready to create the pipeline. If you are not already in the Author and Deploy pane of your Data Factory, go there now.
Right-click Pipelines and choose New pipeline:
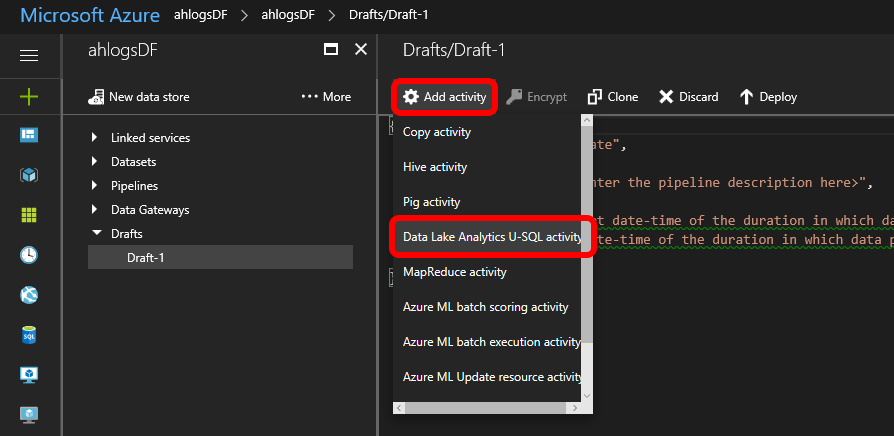
Add a Data Lake Analytics U-SQL activity:
Change the json, so it looks something like this:
{
    "name": "AggregateCityCountPipeline",
    "properties": {
        "description": "Aggregate the counts per city",
        "activities": [
            {
                "type": "DataLakeAnalyticsU-SQL",
                "typeProperties": {
                    "scriptPath": "adfpart3/part3.usql",
                    "scriptLinkedService": "AHBlobStorageLinkedService",
                    "degreeOfParallelism": 1,
                    "parameters": {}
                },
                "inputs": [
                    {
                        "name": "InputForAdfPart3"
                    }
                ],
                "outputs": [
                    {
                        "name": "OutputForAdfPart3"
                    }
                ],
                "policy": {
                    "timeout": "01:00:00",
                    "concurrency": 1
                },
                "scheduler": {
                    "frequency": "Minute",
                    "interval": 15
                },
                "name": "AggregateCount",
                "linkedServiceName": "AHAnalyticsLinkedService"
            }
        ],
        "start": "2017-08-25T08:30:00Z",
        "end": "2017-08-25T12:00:00Z",
        "isPaused": false,
        "hubName": "ahlogsdf_hub",
        "pipelineMode": "Scheduled"
    }
}
There is a few things to notice here:
- I wanted to store the script and dll’s in the Azure Data Lake Store connected to my Analytics account, but that is currently not possible. That is why we used an Azure storage account in step 4.1 (instead of the ADLS). So the linked service for this activity has to be the Azure Storage linked service (“scriptLinkedService”: “AHBlobStorageLinkedService”).
If you try to use ADLS, you get this error:
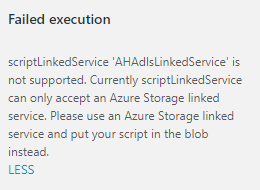
- As of August 2017, you can’t use service principal authentication as recommended here: https://docs.microsoft.com/en-us/azure/data-factory/data-factory-usql-activity#azure-data-lake-analytics-linked-service. It’s not implemented yet. So the authorization for the AHAnalyticsLinkedService may timeout, and you have to re-authorize.
Change the start and end values, and click deploy.
If you’ve done part 1 and 2 of these blog posts, you’ll know that it can take several minutes before you can observe anything.
Open the Data Factory Monitor:
In the activity window, you should (eventually) see a green ready status for your last activity.
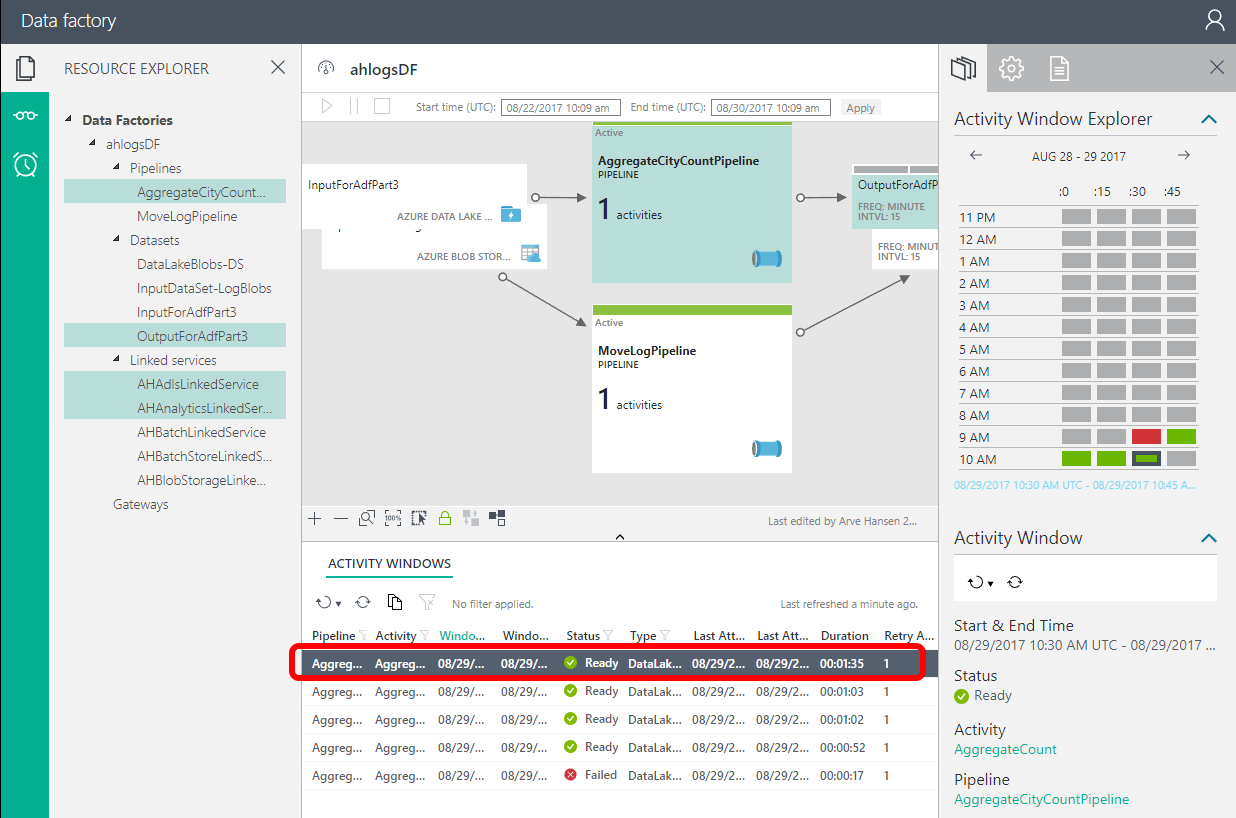
PS: When I deployed the pipeline, the first activity was red, because I had forgotten to upload the input file.
Getting it all setup can be quite hard, especially when everything is not in place (like service principal authentication), so I hope this blog post was helpful. It will be a good reference for me, anyway 🙂
0 Comments on “Azure Data Factory Part 3 U-SQL and JSON”