Setup Duende.IdentityServer using SQLServer and External IDP’s
In a previous post I described setting up IdentityServer4 with ASP.NET Core 3.1. I thought I’ll create a new series of post for setting up Duende.IdentityServer v6 (“IdentityServer6”) using SQL Server and .NET 6.0.
As before, I don’t want to have a local user store. I will be using external IDP’s exclusively.
In this first post, we will setup IdentityServer6 and verify that we can get a token using the seed data you find in Config.cs. In the next post, we will setup an external IDP.
This post is divided into 4 parts:
- Create an empty solution
- Create a project using a Duende template
- Setup SQL Server
- Test that we can get a token
You can find the Duende.IdentityServer documentation here: https://docs.duendesoftware.com/identityserver/v6/overview/. Detailed information can be found there.
1. Create an empty Solution
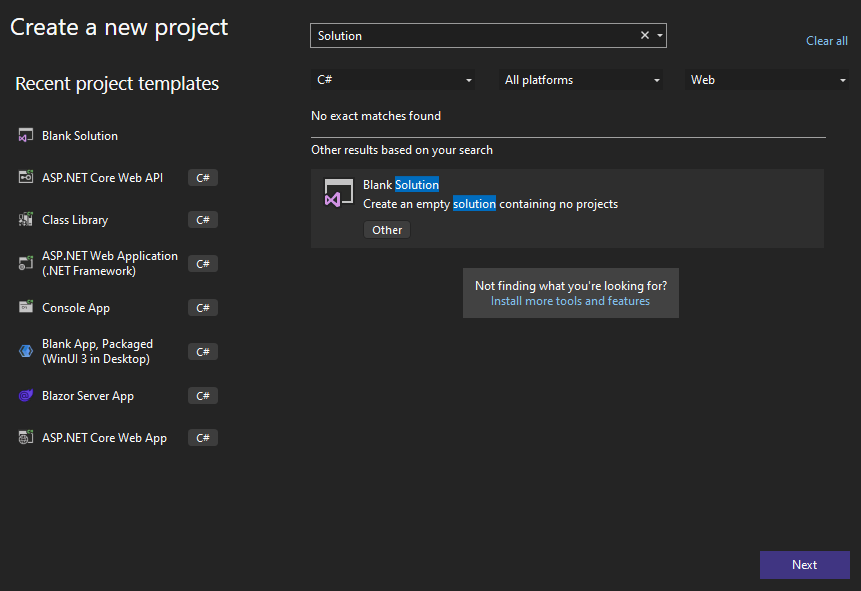
I called mine AH.IDS
2. Create a project using a Duende template
In PowerShell, go the folder for the solution you just created. Run the following command to install/update the IdentityServer templates:
dotnet new --install Duende.IdentityServer.Templates
Run the following command to create a new project. I called mine AH.IdentityServer6
dotnet new isef -n AH.IdentityServer6
Answer No when asked to seed the database:

3. Setup SQL Server
The template from Duende sets up Entity Framework and SQLite. Replace the Microsoft.EntityFrameworkCore.Sqlite NuGet package with the Microsoft.EntityFrameworkCore.SqlServer NuGet package.
Change the HostingExtensions.cs
The file should look like this:
    public static WebApplication ConfigureServices(this WebApplicationBuilder builder)
    {
        builder.Services.AddRazorPages();

        var connectionString = builder.Configuration.GetConnectionString("DefaultConnection");
        var migrationsAssembly = typeof(Program).GetTypeInfo().Assembly.GetName().Name;

        var isBuilder = builder.Services
            .AddIdentityServer(options =>
            {
                options.Events.RaiseErrorEvents = true;
                options.Events.RaiseInformationEvents = true;
                options.Events.RaiseFailureEvents = true;
                options.Events.RaiseSuccessEvents = true;

                // see https://docs.duendesoftware.com/identityserver/v5/fundamentals/resources/
                options.EmitStaticAudienceClaim = true;
            })
            // this adds the config data from DB (clients, resources, CORS)
            .AddConfigurationStore(options =>
            {
                options.ConfigureDbContext = b =>
                    b.UseSqlServer(connectionString,
                        sql => sql.MigrationsAssembly(migrationsAssembly));
            })
            // this is something you will want in production to reduce load on and requests to the DB
            //.AddConfigurationStoreCache()
            //
            // this adds the operational data from DB (codes, tokens, consents)
            .AddOperationalStore(options =>
            {
                options.ConfigureDbContext = b =>
                    b.UseSqlServer(connectionString,
                        sql => sql.MigrationsAssembly(migrationsAssembly));

                // this enables automatic token cleanup. this is optional.
                options.EnableTokenCleanup = true;
                options.RemoveConsumedTokens = true;
            });
Change your ConnectionString
If you are running locally, you can use something like this: “Server=.;Database=<db-name>;Trusted_Connection=True;MultipleActiveResultSets=true”
Replace Migrations
Clone the following repository somwhere on your disk: https://github.com/DuendeSoftware/IdentityServer.git
Remove everything under the Migrations folder in your project, and replace it with the following Migrations you just cloned:

Update the database
I used the InitializeDatabase method you can find in the QuickStart documentation here: https://docs.duendesoftware.com/identityserver/v6/quickstarts/4_ef/
private static void InitializeDatabase(IApplicationBuilder app)
{
    using (var serviceScope = app.ApplicationServices.GetService<IServiceScopeFactory>().CreateScope())
    {
        serviceScope.ServiceProvider.GetRequiredService<PersistedGrantDbContext>().Database.Migrate();

        var context = serviceScope.ServiceProvider.GetRequiredService<ConfigurationDbContext>();
        context.Database.Migrate();
        if (!context.Clients.Any())
        {
            foreach (var client in Config.Clients)
            {
                context.Clients.Add(client.ToEntity());
            }
            context.SaveChanges();
        }

        if (!context.IdentityResources.Any())
        {
            foreach (var resource in Config.IdentityResources)
            {
                context.IdentityResources.Add(resource.ToEntity());
            }
            context.SaveChanges();
        }

        if (!context.ApiScopes.Any())
        {
            foreach (var resource in Config.ApiScopes)
            {
                context.ApiScopes.Add(resource.ToEntity());
            }
            context.SaveChanges();
        }
    }
}
And you call it from the ConfigurePipeline method:
public static WebApplication ConfigurePipeline(this WebApplication app)
{
    app.UseSerilogRequestLogging();

    if (app.Environment.IsDevelopment())
    {
        app.UseDeveloperExceptionPage();
    }

    InitializeDatabase(app);

    app.UseStaticFiles();
    app.UseRouting();
    app.UseIdentityServer();
    app.UseAuthorization();

    app.MapRazorPages()
        .RequireAuthorization();

    return app;
}
When you now start up the Web Application, the database is created and initialized.
NOTE: Since we have an empty database, the Clients, IdentityResources or ApiScopes in Config.cs will be created. You should find another way to add, remove and update configuration data. E.g. creating an API.
You can also update the database from PowerShell like this:
dotnet ef database update -c PersistedGrantDbContext
dotnet ef database update -c ConfigurationDbContext
4. Test that we can get a token
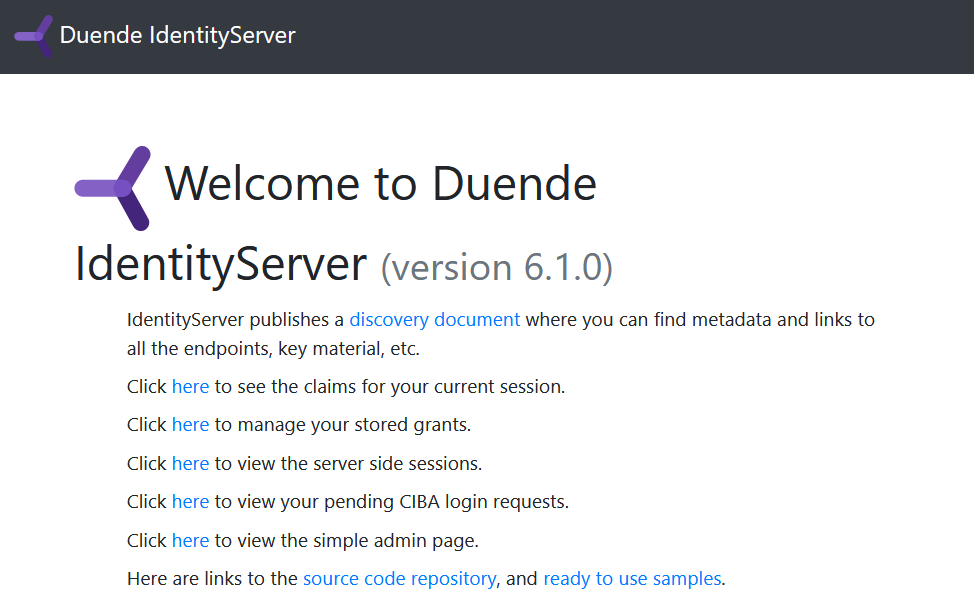
We are now going to test that it works,
Run the application. You should get a web page like this:
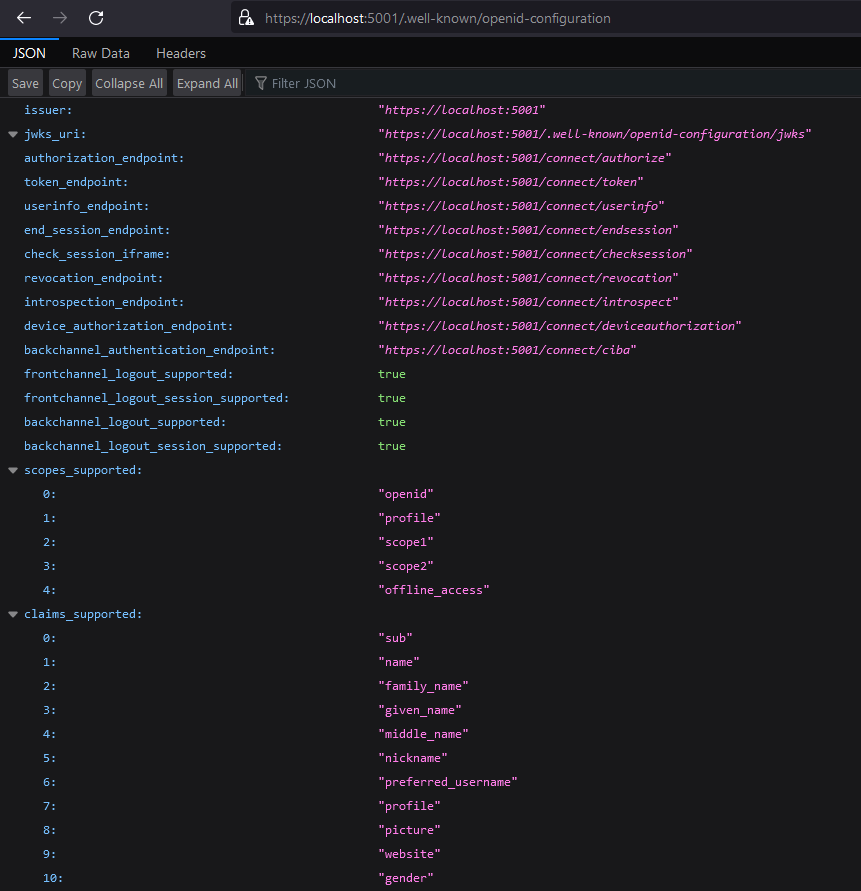
Click on the “discovery document” link to check that you get the discovery document:
We can now use Postman to send a POST request to the token endpoint. The values in the body we get from the Config.cs file:

If everything is setup correctly, the request should be successful, and you should get an access_token in the response.
That is it. You now have IdentityServer6 up-and-running using SQL Server.