Azure Data Factory Part 2 Custom Activity
This is part 2 (of 3) of my blog series on the Azure Data Factory. You can find the other two parts here:
Custom activities in ADF
You can use a DataFactory to copy data, but currently there is no way of moving data (i.e. you want the data removed from the source when it’s copied to the destination). ADF doesn’t have a move activity, yet.
If you think a move activity is a good idea, vote for it at the Microsoft feedback forums:
https://feedback.azure.com/forums/270578-data-factory/suggestions/13427742-move-activity.
For now, you have to solve this by creating a custom activity. In my case, I have blobs in an Azure Blob storage that I want to move to an Azure DataLake store.
In this blog post we will:
- Create and setup an Azure Batch pool in the Azure Portal (a custom activity has to run somewhere)
- Create a Custom Activity in Visual Studio 2017, using the Azure Management DataFactories API. The custom activity will:
- Connect and download data from Azure Blob Storage
- Connect and upload data to an Azure Data Lake Store.
- Delete the data from the blob storage when done
- Create a pipeline that uses this Custom Activity
Microsoft has documented how to create a custom activity here: https://docs.microsoft.com/en-us/azure/data-factory/data-factory-use-custom-activities
Limitations (as of July 2017)
The Data Factory service launcher requires version 4.3.0 of WindowsAzure.Storage. If you add a reference to a later version of Azure Storage assembly in your custom activity project, you’ll see an error when the activity executes.
Data Factory requires version 6.0 of Newtonsoft.Json (newer versions will cause errors).
Data Factory does not support custom activities compiled against .NET Framework versions later than 4.5.2 (later framework will cause errors).
We will get around some of these limitations by using Appdomain isolation.
Prerequisites
If you haven’t done Part 1, you should do that first. You will need the Azure Data Factory (ADF), Azure Blob storage and an Azure Data Lake Store (ADLS) from this tutorial.
You will also need a compute resource for your custom activity. This can be either an Azure Batch pool of virtual machines or a Windows-based Azure HDInsight cluster that has to be set up beforehand. You can also get a HDInsight cluster created for you on-demand at runtime, but we will not use this option (it can take up to 20 minutes(!) to get a cluster setup on demand).
We will be setting up an Azure Batch pool.
Setting up Azure Batch
If you already have this setup, you can jump to Create custom activity.
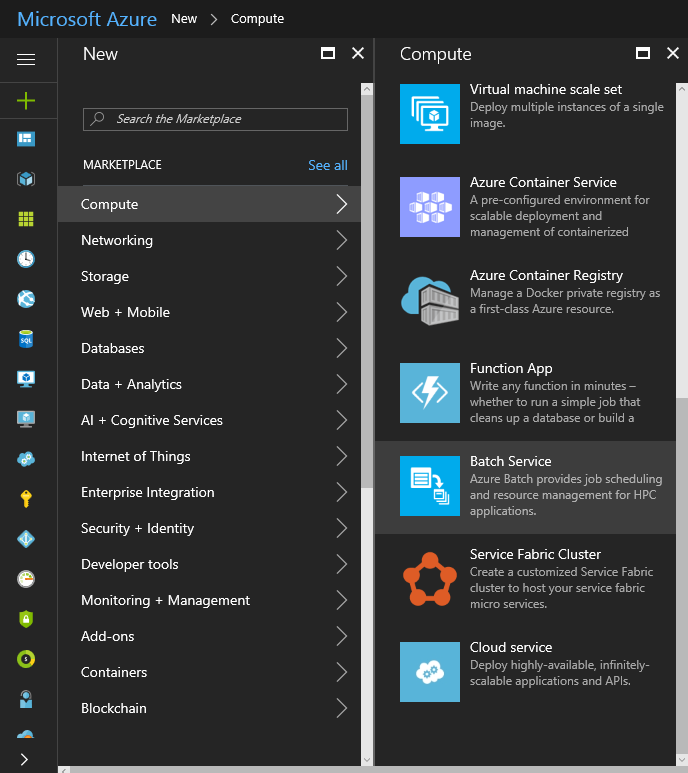
Open the Azure Portal, and click New -> Compute -> Batch Service
Fill in the information. It should look something like this:
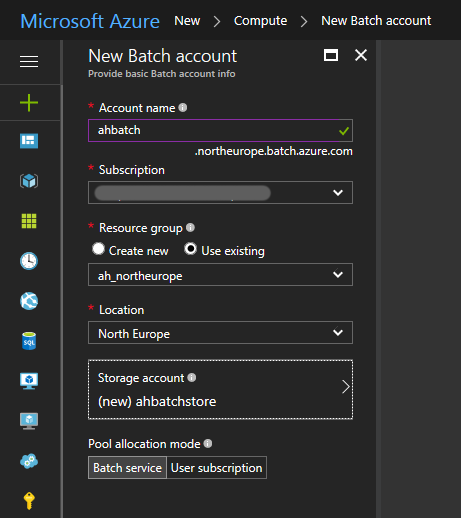
I created a new storage account with default settings (Standard, LRS).
Click Create.
Open your Azure Batch account and click Pools -> Add

After you press Add, set the following parameters (leave the rest at default):
- Pool ID: Give it a name
- Image Type: Cloud Services
- OS family: Windows Server 2012 R2 (OBS: you will not see this parameter until you choose correct Image Type)
- Node size: Choose your size. Notice that not all VMSizes (e.g. F series) are allowed for pools created with CloudServiceConfiguration.
- Scale
- Mode:Fixed
- Target dedicated nodes: 2
- Optional settings:
- Max tasks per node: 2
It should look something like this:
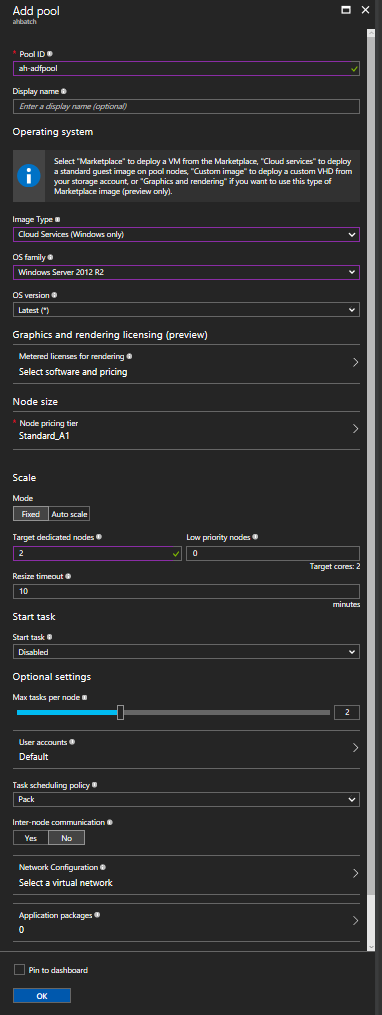
Click OK
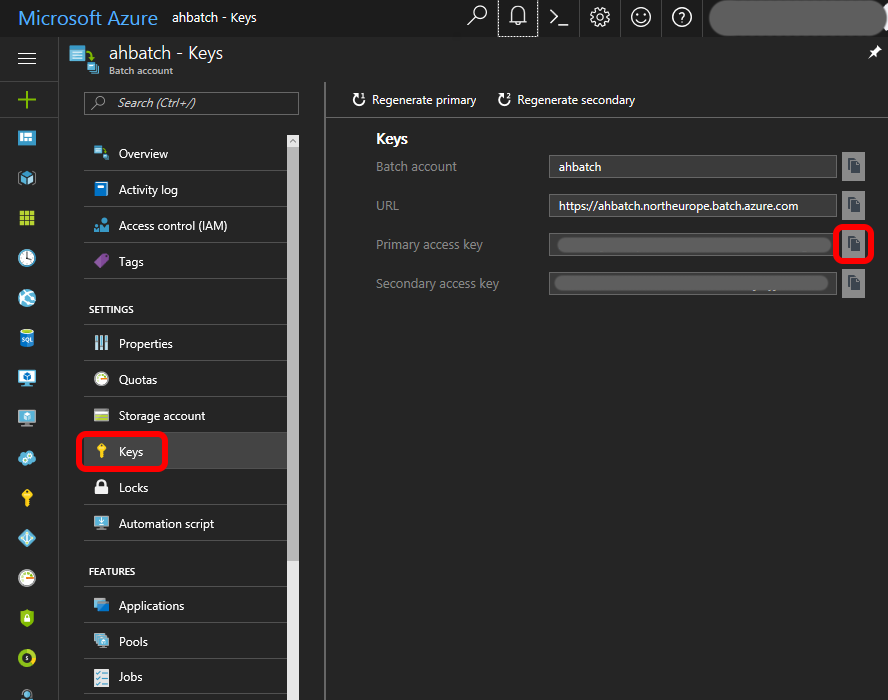
You are going to need the following for the ADF (my values are in parentheses):
- Account name (ahbatch)
- Account key ( yeah right 🙂 )
- URI without account name (https://northeurope.batch.azure.com)
- Pool name (ah-adfpool)
You get the account key by clicking Keys in the menu, then copy the PRIMARY ACCESS KEY.
Create Custom Activity
- Open VS 2017 and create a new Class Library (.NET Framework) project. I called my project MoveBlobCustomActivity, and my solution ADFCustomActivity.
- Right-click your project (in the Solution Explorer) and make sure the Target Framework is .NET Framework 4.5.2
- Add NuGet package Microsoft.Azure.Management.DataFactories
- Add Nuget package WindowsAzure.Storage (latest version)
- OBS: Read this about AppDomain isolation. We will use this workaround, that’s why you can install the latest version of WindowsAzure.Storage. Microsoft claims that you should use version 4.3.0. I tried this, and ended up spending a LOT of time trying to solve “The remote server returned an error: (409) Conflict”. This error disappeared when I updated the WindowsAzure.Storage package, so I’m pretty sure there was a nasty bug in that version.
- Remove Class1 and create a new class called MoveBlobCustomActivity. Also change the namespace to MoveBlobCustomActivityNS, to avoid confusion. Create the class like this:
using System.Collections.Generic; using Microsoft.Azure.Management.DataFactories.Models; using Microsoft.Azure.Management.DataFactories.Runtime; namespace MoveBlobCustomActivityNS { public class MoveBlobCustomActivity: IDotNetActivity { public IDictionary<string, string> Execute( IEnumerable<LinkedService> linkedServices, IEnumerable<Dataset> datasets, Activity activity, IActivityLogger logger) { logger.Write("\nAll Linked Services(s) Below "); foreach (LinkedService ls in linkedServices) logger.Write("\nLinked Service: " + ls.Name); logger.Write("\nAll Dataset(s) Below "); foreach (Dataset ds in datasets) logger.Write("\n\tDataset: " + ds.Name); return new Dictionary<string, string>(); } } }
(As you see from the code, we’re not doing anything useful just now. First we’ll just see if we can get the custom activity to log some information)
Upload Custom Activity
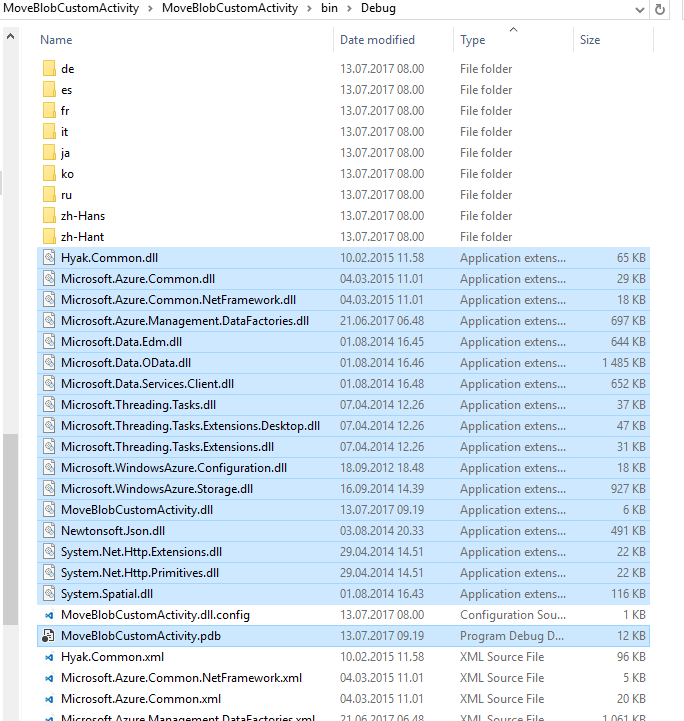
Compile your code
Create a zip file MoveBlobCustomActivity.zip that contains all the binaries in the \bin\Debug (or bin\Release) folder. Include the MyDotNetActivity.pdb file so that you get additional details such as line number in the source code, in case there are any errors.
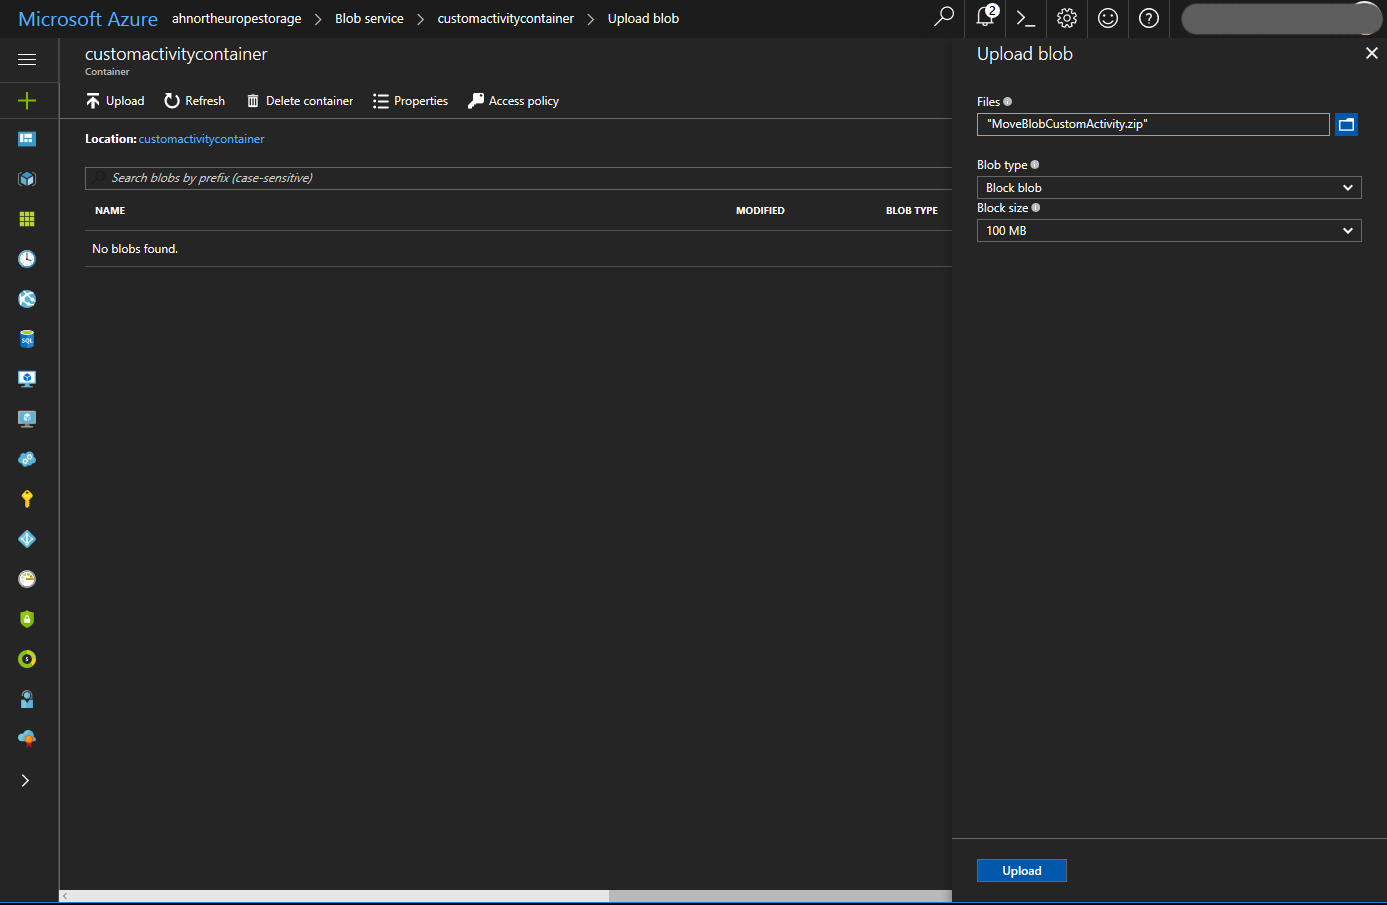
On the storage account we used for the Azure Batch service (ahbatchstore), create a container called customactivitycontainer, and upload the zip file there. In the portal, it will look something like this:
Create pipeline with Custom Activity
We’ll use the same DataFactory as in Part 1, but will replace the pipeline. We also have to create a Linked Service for Azure Batch.
Create Linked Service for Azure batch storage
Go to the ADF you created in step 1, and click Author and deploy.
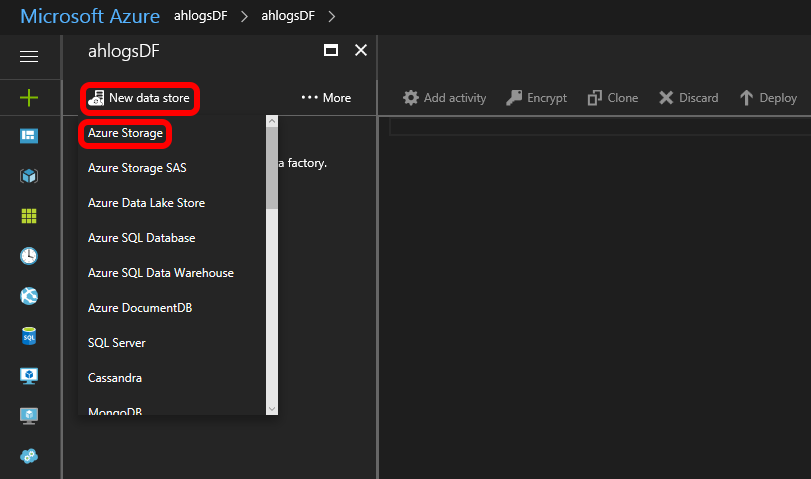
Then click New data store -> Azure Storage
Change the json, so it looks something like below, then click Deploy
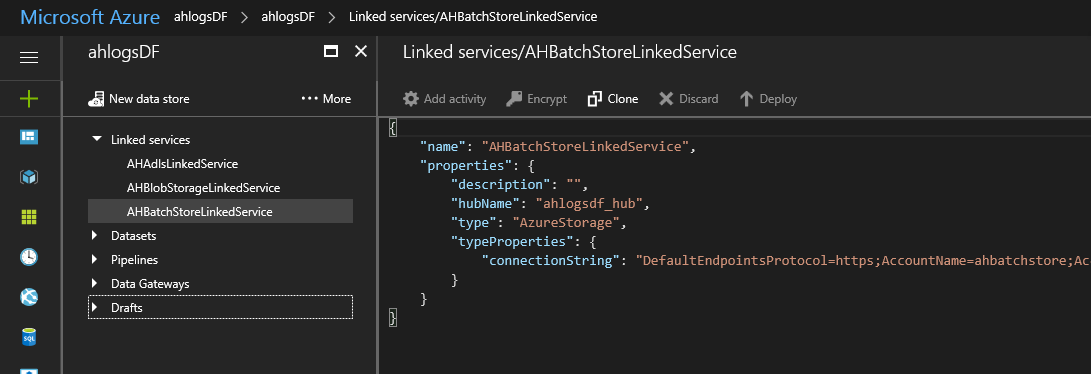
To get the connection string, go to your storage account -> Settings -> Access keys
You don’t have to enter hub name. It will be created for you. Just make sure you use the same hub name everywhere in your Data Factory.
Create Linked Service for Azure Batch
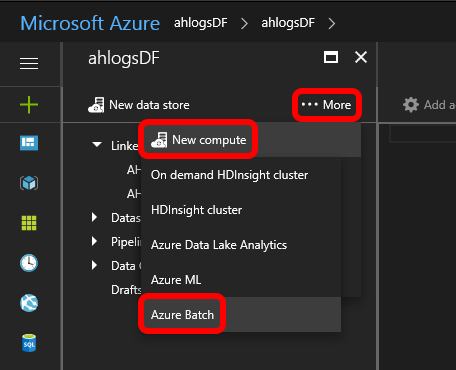
You should still be in the Author and deploy blade. Click …More -> New compute -> Azure Batch
Change the json, so it looks something like this:
{
    "name": "AHBatchLinkedService",
    "properties": {
        "description": "",
        "hubName": "ahlogsdf_hub",
        "type": "AzureBatch",
        "typeProperties": {
            "accountName": "ahbatch",
            "accessKey": "**********",
            "poolName": "ah-adfpool",
            "batchUri": "https://northeurope.batch.azure.com",
            "linkedServiceName": "AHBatchStoreLinkedService"
        }
    }
}
Then click Deploy.
Change the pipeline
We are now going to replace the pipeline that is already there (there should only be one: CopyLogPipeline).
Click on it, and click Clone.
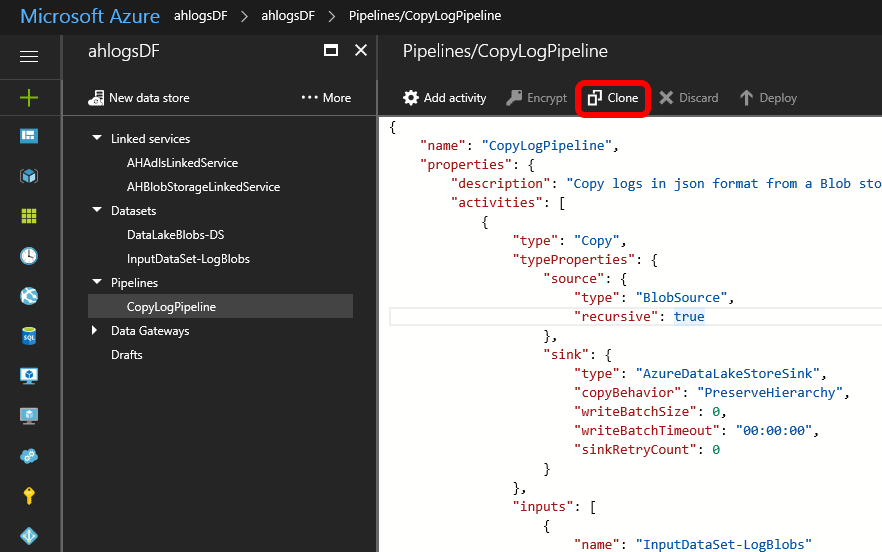
You should now have a CopyLogPipeline-1 under Drafts.
Right-click on the original CopyLogPipeline and delete it.
Change the json for CopyLogPipeline-1, so it looks something like this:
{
    "name": "MoveLogPipeline",
    "properties": {
        "description": "Move logs from the Blob store to the Data Lake store",
        "activities": [
            {
                "type": "DotNetActivity",
                "typeProperties": {
                    "assemblyName": "MoveBlobCustomActivity.dll",
                    "entryPoint": "MoveBlobCustomActivityNS.MoveBlobCustomActivity",
                    "packageLinkedService": "AHBatchStoreLinkedService",
                    "packageFile": "customactivitycontainer/MoveBlobCustomActivity.zip",
                    "extendedProperties": {
                        "InputToDelete": "InputDataSet-LogBlobs"
                    }
                },
                "inputs": [
                    {
                        "name": "InputDataSet-LogBlobs"
                    }
                ],
                "outputs": [
                    {
                        "name": "DataLakeBlobs-DS"
                    }
                ],
                "policy": {
                    "timeout": "1.00:00:00",
                    "concurrency": 1
                },
                "scheduler": {
                    "frequency": "Minute",
                    "interval": 15
                },
                "name": "MoveBlobCustomActivity",
                "linkedServiceName": "AHBatchLinkedService"
            }
        ],
        "start": "2017-07-14T10:00:00Z",
        "end": "2017-07-15T14:00:00Z",
        "isPaused": false,
        "hubName": "ahlogsdf_hub",
        "pipelineMode": "Scheduled"
    }
}
Click Deploy
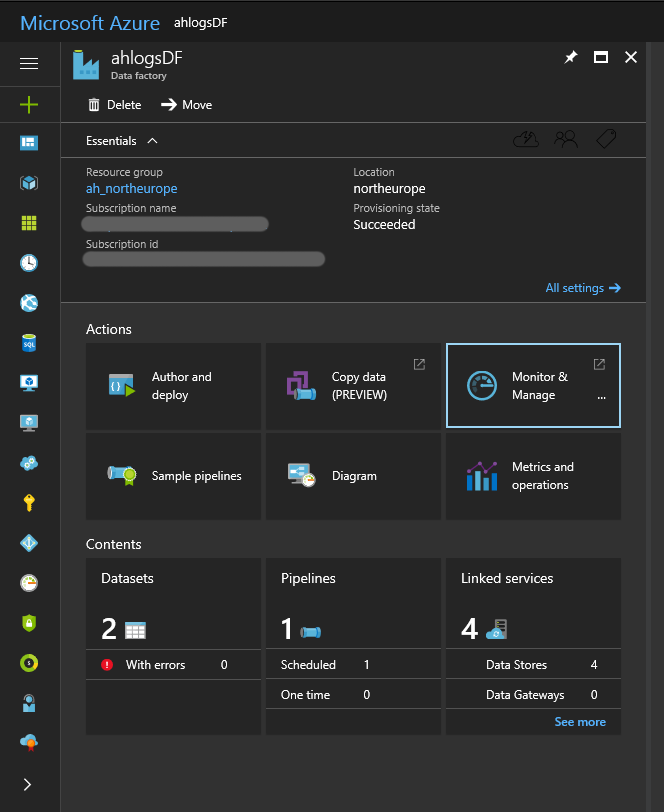
When the pipeline runs, Click Monitor & Manage on the Data Factory Overview blade
It can take a few minutes from you deploy, until the pipeline runs.
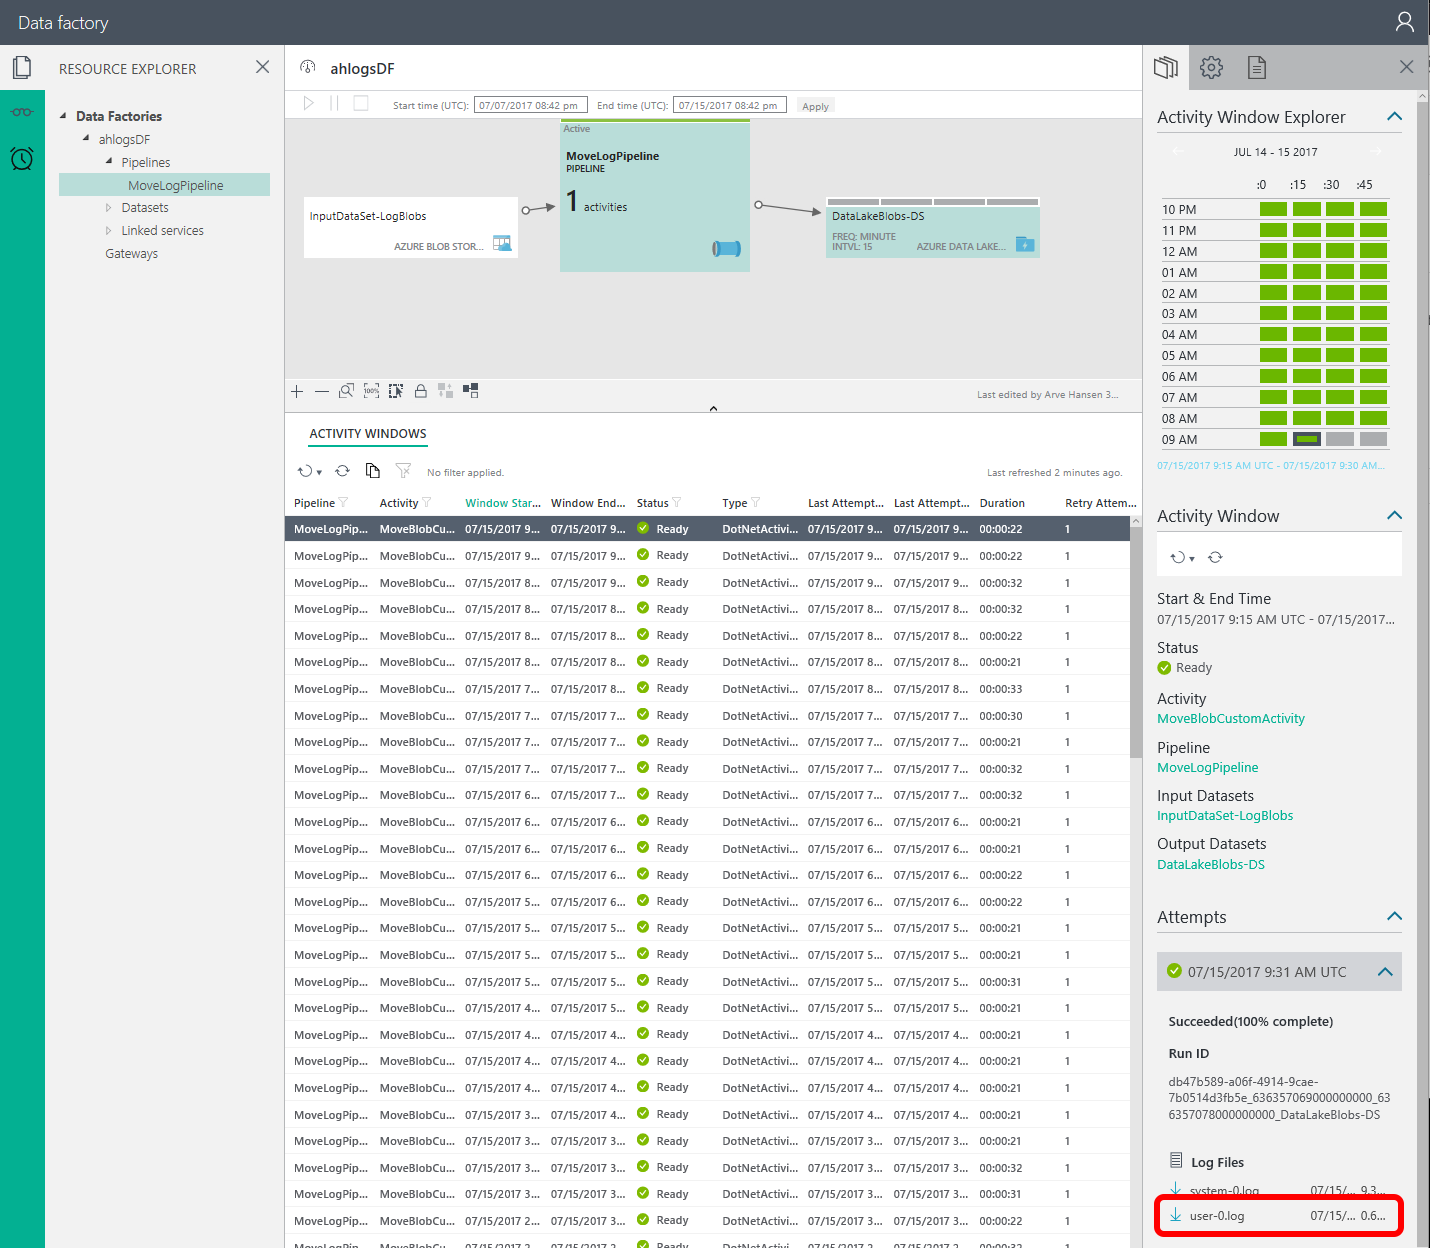
If you can’t see anything in the activity windows (see below), check the comments from Step 4.3: Create the pipeline in Part 1.
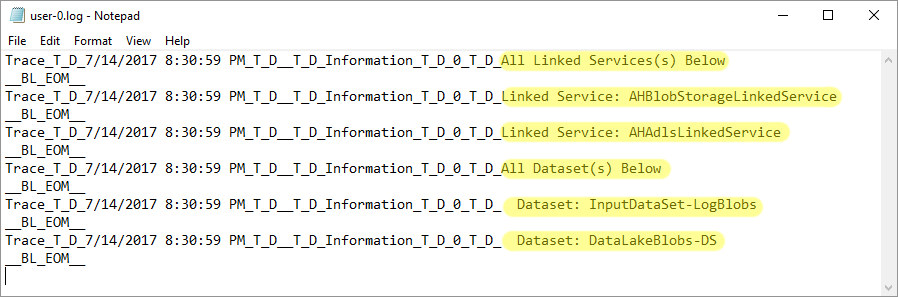
The click on one of the entries in the Activity Windows list that has Status = Ready. Scroll down the right panel, until you find Log Files, and double-click user-0.log:
In the log file, you should find your log entries:
Update Custom Activity
So currently, all we are doing is logging the Linked Services and Data sets.
Let’s now implement the full functionality. You can find the files on GitHub: https://github.com/ArveH/ADFCustomActivity. I will not be listing the code here.
- Open the solution you created earlier (in Create Custom Activity)
- Add the following NuGet packages:
- Microsoft.Azure.Management.DataLake.Store
- Microsoft.Rest.ClientRuntime.Azure.Authentication
- Add the following files:
- AdlsHelper.cs
- AdlsInfo.cs
- BlobStoreHelper.cs
- CrossAppDomainDotNetActivity.cs
- ICrossAppDomainDotNetActivity.cs
- MoveBlobActivityContext.cs
- And change MoveBlobCustomActivity.cs
Build your solution, create a new zip file, and upload it to the customactivitycontainer (like we did here: Upload Custom Activity)
Prepare source and destination
Before we update the pipeline, we’ll delete everything from the Data Lake Store:
![]()
and make sure we have at least one file in the blob store:
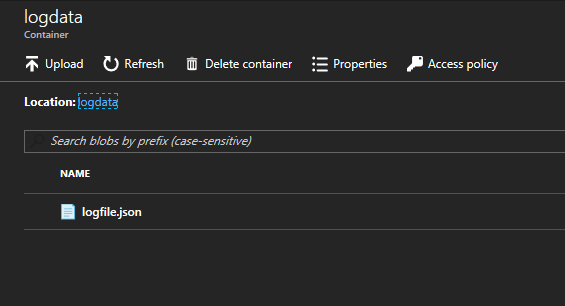
OBS: The blob has to be of type CloudBlockBlob (not e.g. CloudAppendBlob), otherwise the Custom Activity will fail (unless you change the code to handle your type)
Re-deploy the pipeline or re-run an activity window
To redeploy the pipeline, I usually just change the End date and click Deploy.
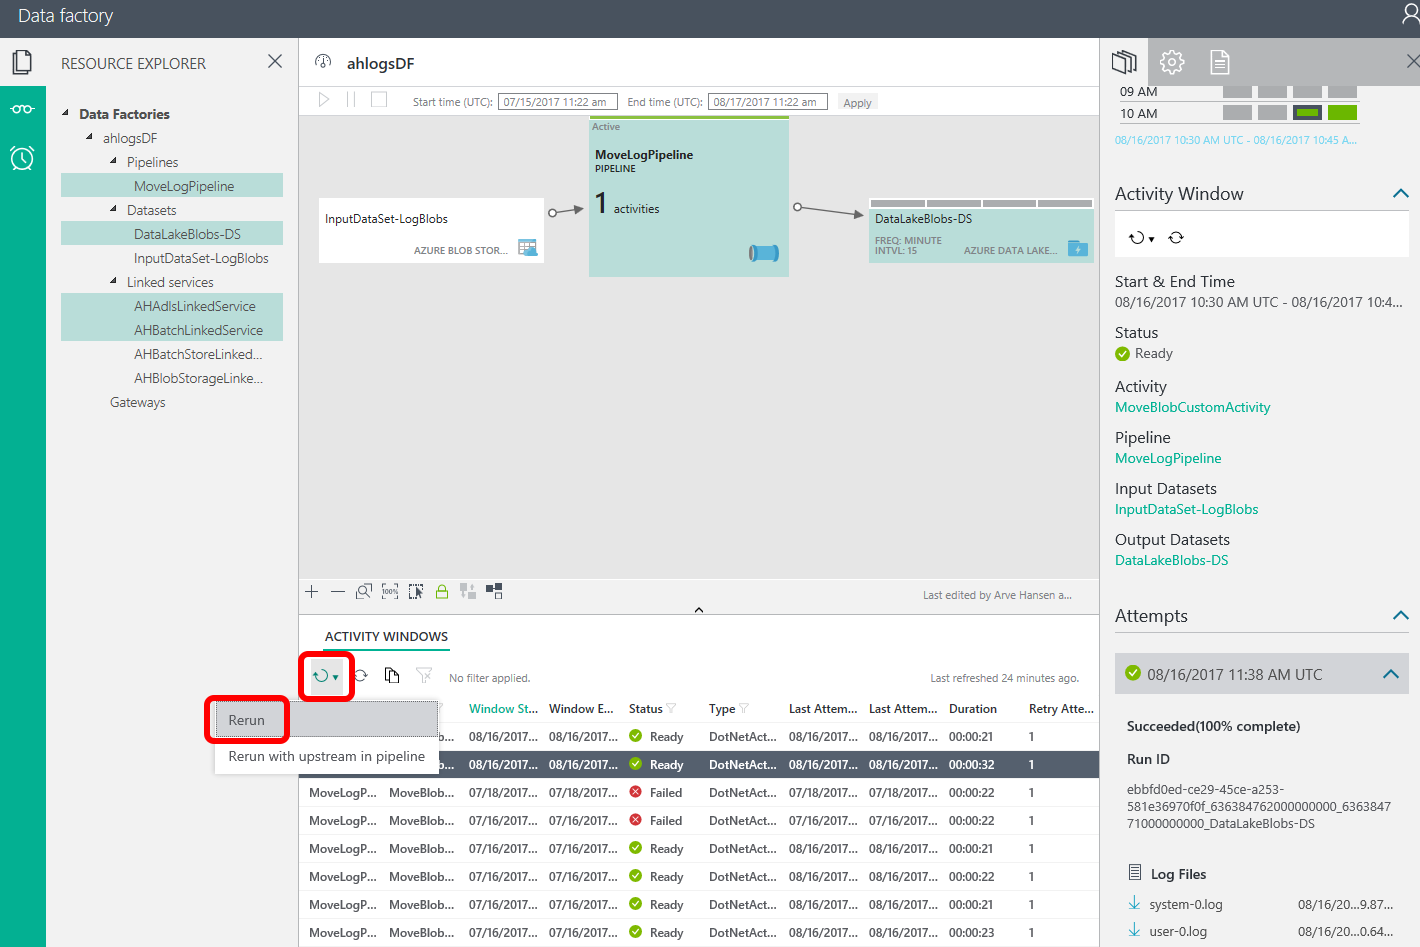
To re-run an activity window, choose the activity window in the list of activity windows, and click the rerun icon, then Rerun:
So I get this development cycle:
- Change code for Custom Activity
- Zip and upload zip to container
- Rerun activity window (or change End date for pipeline and click deploy)
- Wait (re-running can take a minute or four)
There is no easy way to debug your code “live”. You would probably have to create your own framework for running the custom activity locally (like Gerhard Brueckl has done here: https://github.com/gbrueckl/Azure.DataFactory.LocalEnvironment)
Some errors I encountered while creating the custom activity
- Exception with message: “The given key was not present in the dictionary.”.
- I was looking for extended property InputToDelete in custom activity, while I used inputToDelete (lower-case i) in the pipeline definition.
- Exception with message: “The remote server returned an error: (409) Conflict.”
- Spent A LOT of time on this. Didn’t figure out exactly what was wrong. Recreated the error in a separate test project, and error disappeared when I updated the WindowsAzure.Storage NuGet package. I guess version 4.3.0 was the problem, so had to use the AppDomain isolation workaround. All I had to do in the test project to recreate the error, was to get a container, and call container.ListBlobs().
0 Comments on “Azure Data Factory Part 2 Custom Activity”